
Generate Articles in Bulk with AI Article Writer
This guide shows how to generate articles in bulk with the Autoblogging.ai AI article writer, using the bulk form. You paste a list of titles, choose the settings once, and every title comes back as a finished SEO article that can be internally linked, scheduled and posted to WordPress for you. The video below walks through the same five steps on a real batch.
Video: Programmatic SEO With AI: Bulk Generate Articles and Auto Post to WordPress
Step 1: Open the bulk article writer
Sign in to your Autoblogging.ai dashboard and open Bulk Generate Articles in Quick Mode from the Generate menu (direct link: dash.autoblogging.ai/bulk).
Step 2: Paste your titles and name the project
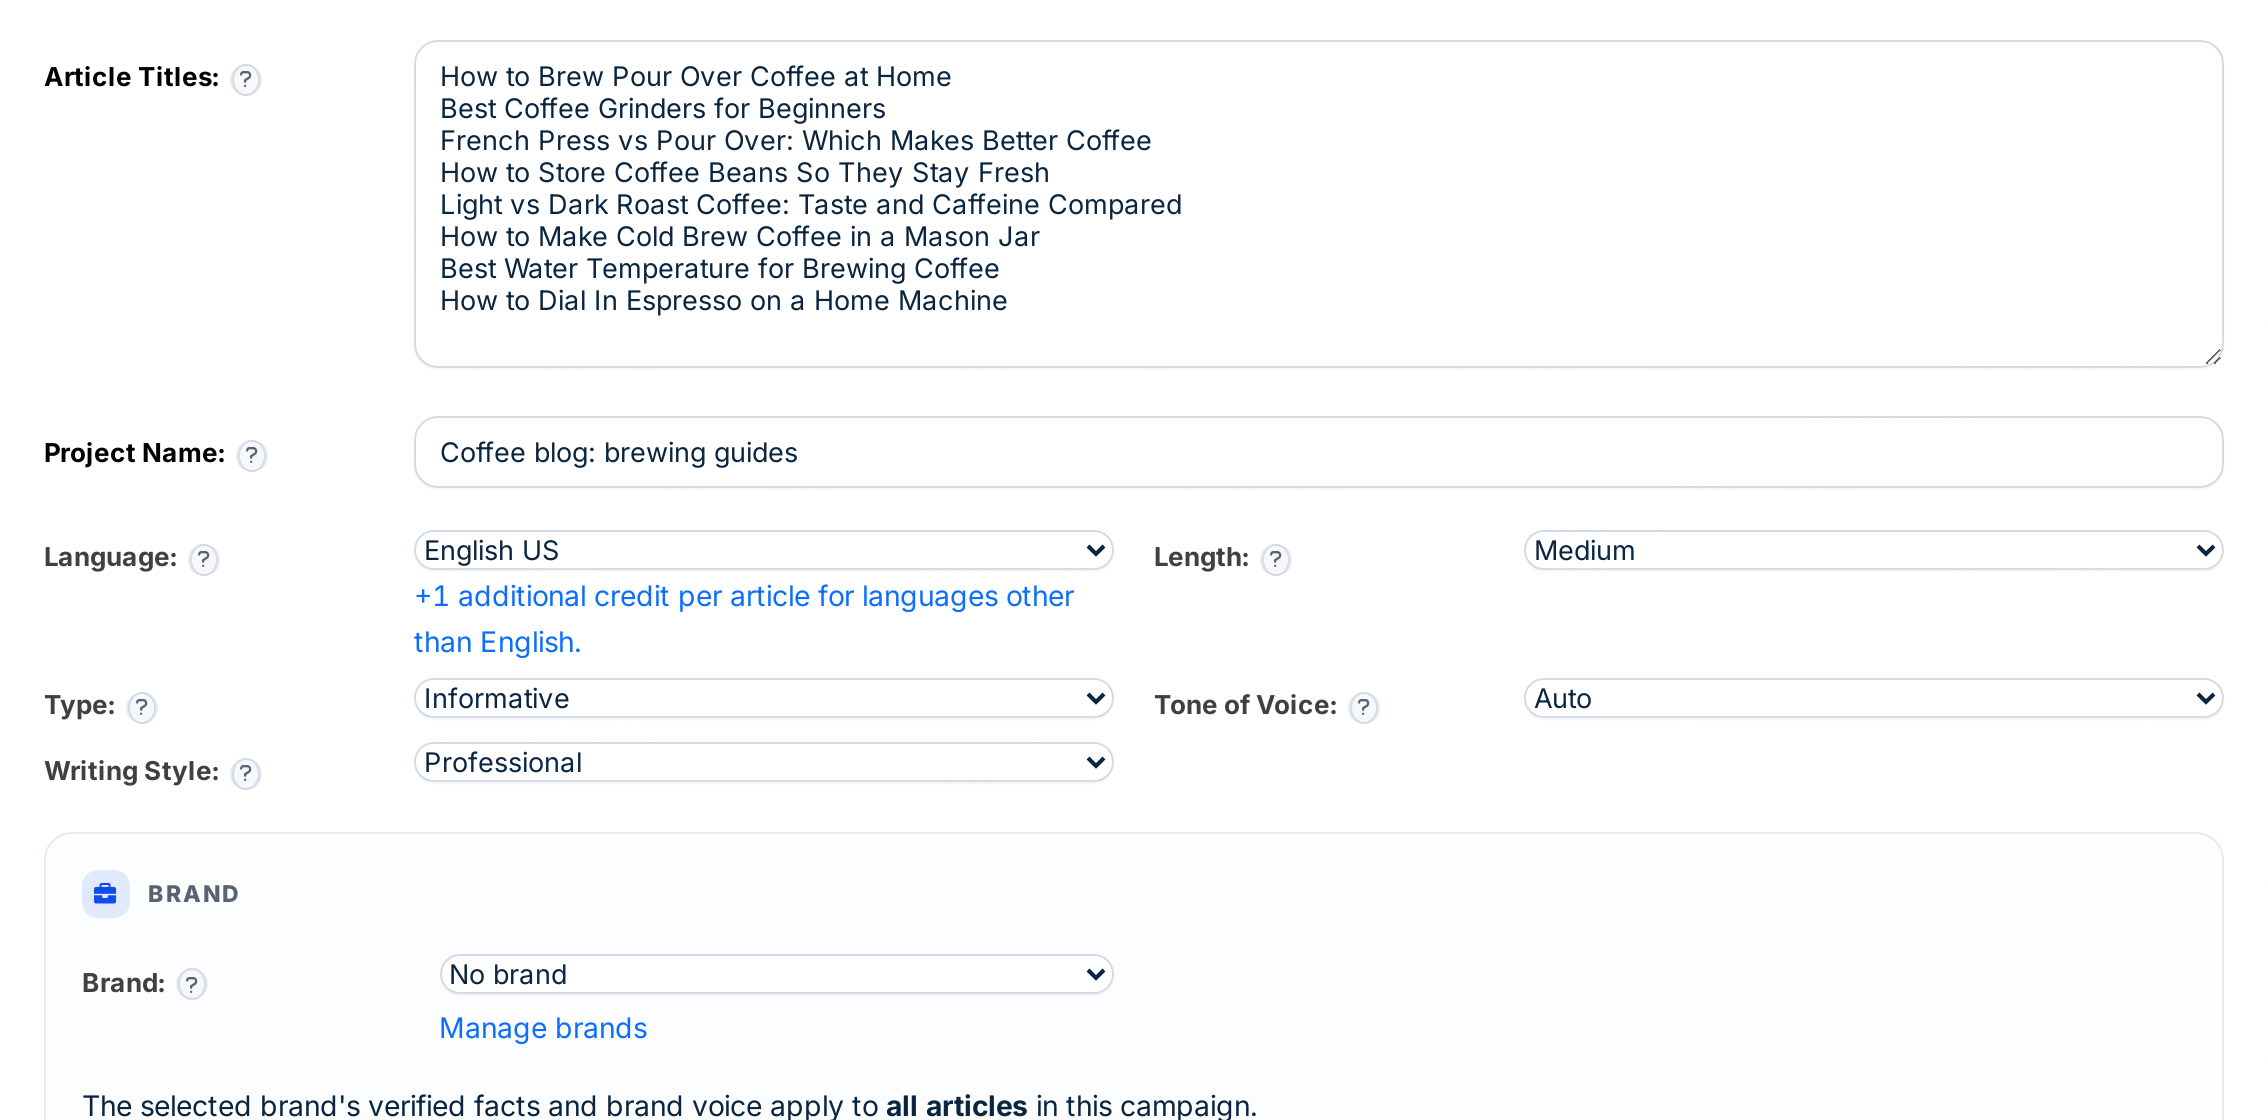
Paste up to 500 article titles into the Article Titles box, one per line. The best batches come from one branch of a content plan: titles on the same subject, so the articles can link to and support each other. Then give the batch a project name so you can find it later.
Step 3: Choose the writing settings
These apply to every article in the batch:
- Language: 38 options. Languages other than English add one credit per article.
- Length, type, tone of voice and writing style: for example a medium-length informative article in a professional style.
- Brand (optional): the selected brand’s verified facts and voice apply to all articles in the batch.
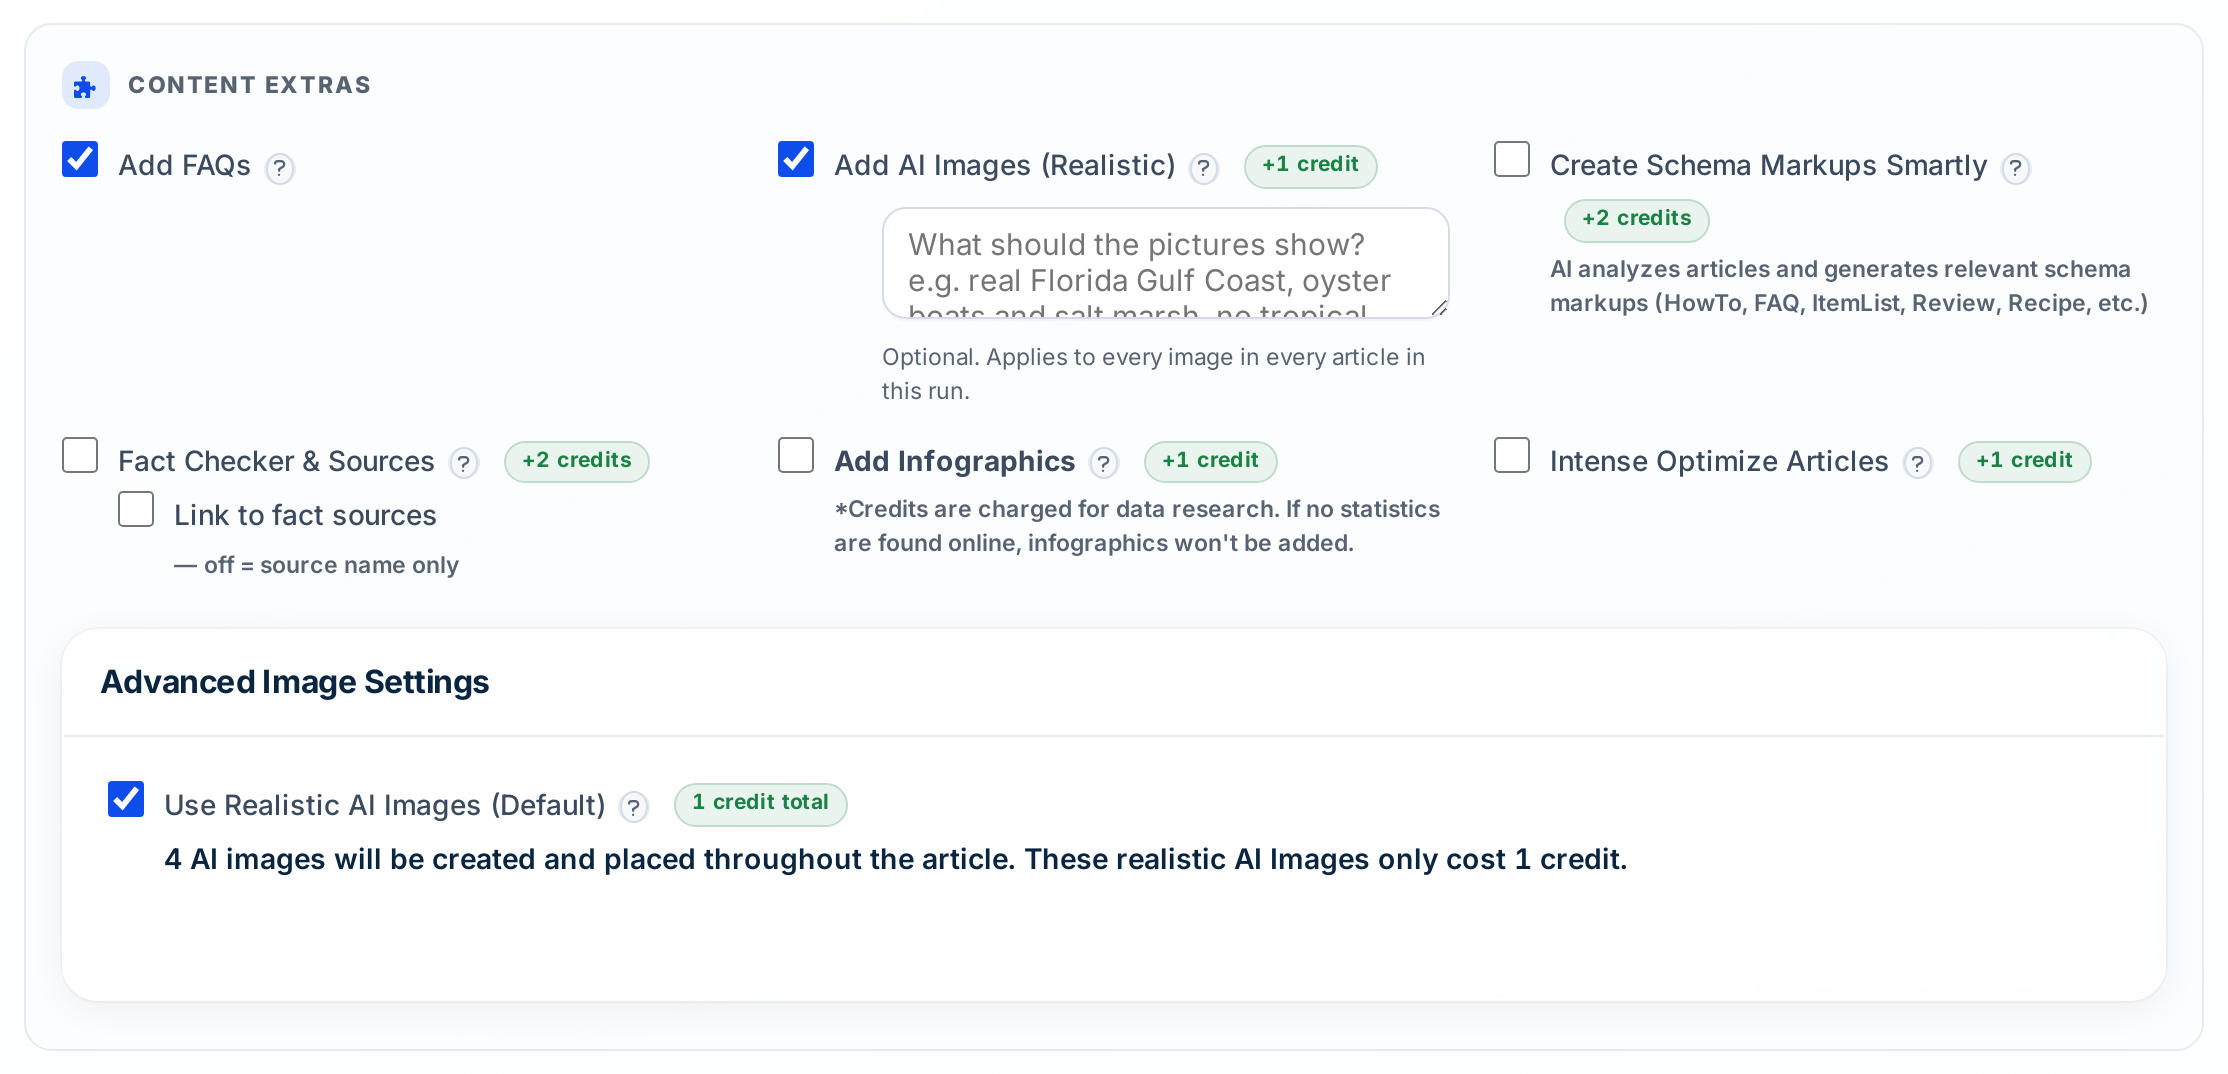
- Content extras: FAQs, schema markup, fact checker and sources, infographics, and four realistic AI images placed through each article.
Step 4: Link, schedule and auto-post
These are the settings that decide whether a bulk batch helps your rankings.
Internal linking. Tick Internal Linking and enter your domain. Each article then links to related posts on your site, so none of them is an orphan page that builds no authority.
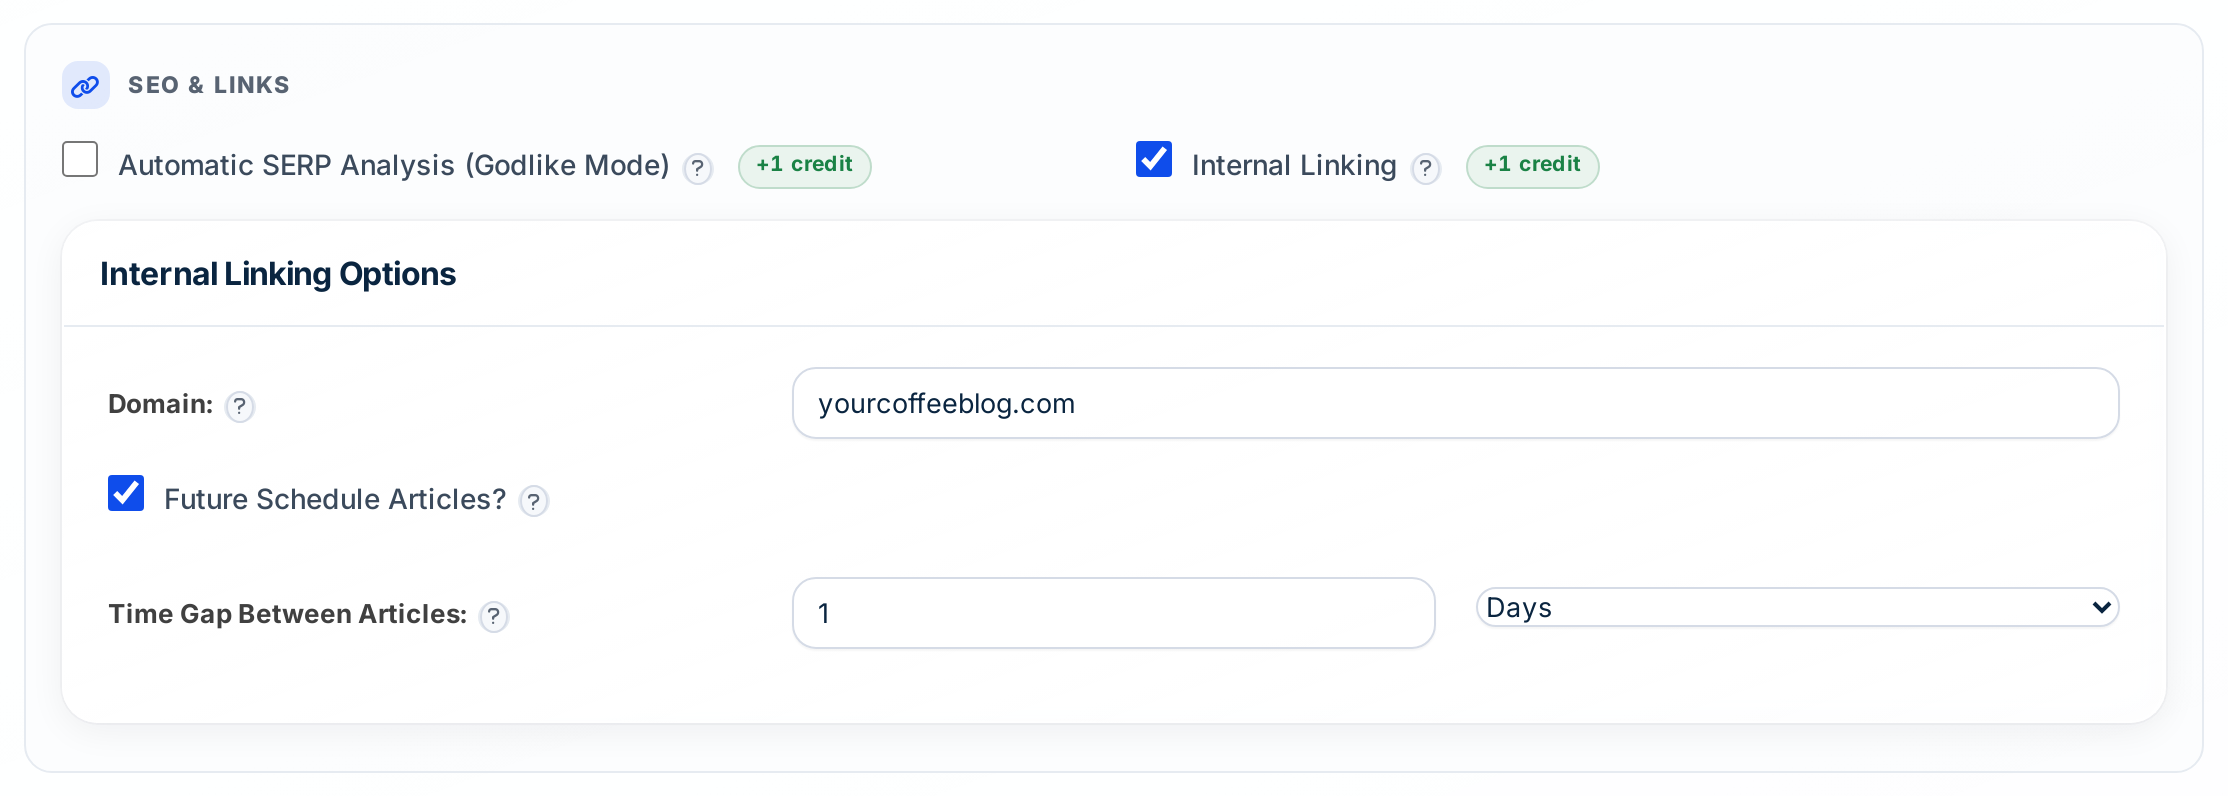
Scheduling. Tick Future Schedule Articles and set a time gap between articles, for example one day. The batch then publishes gradually instead of dropping every post in the same minute.
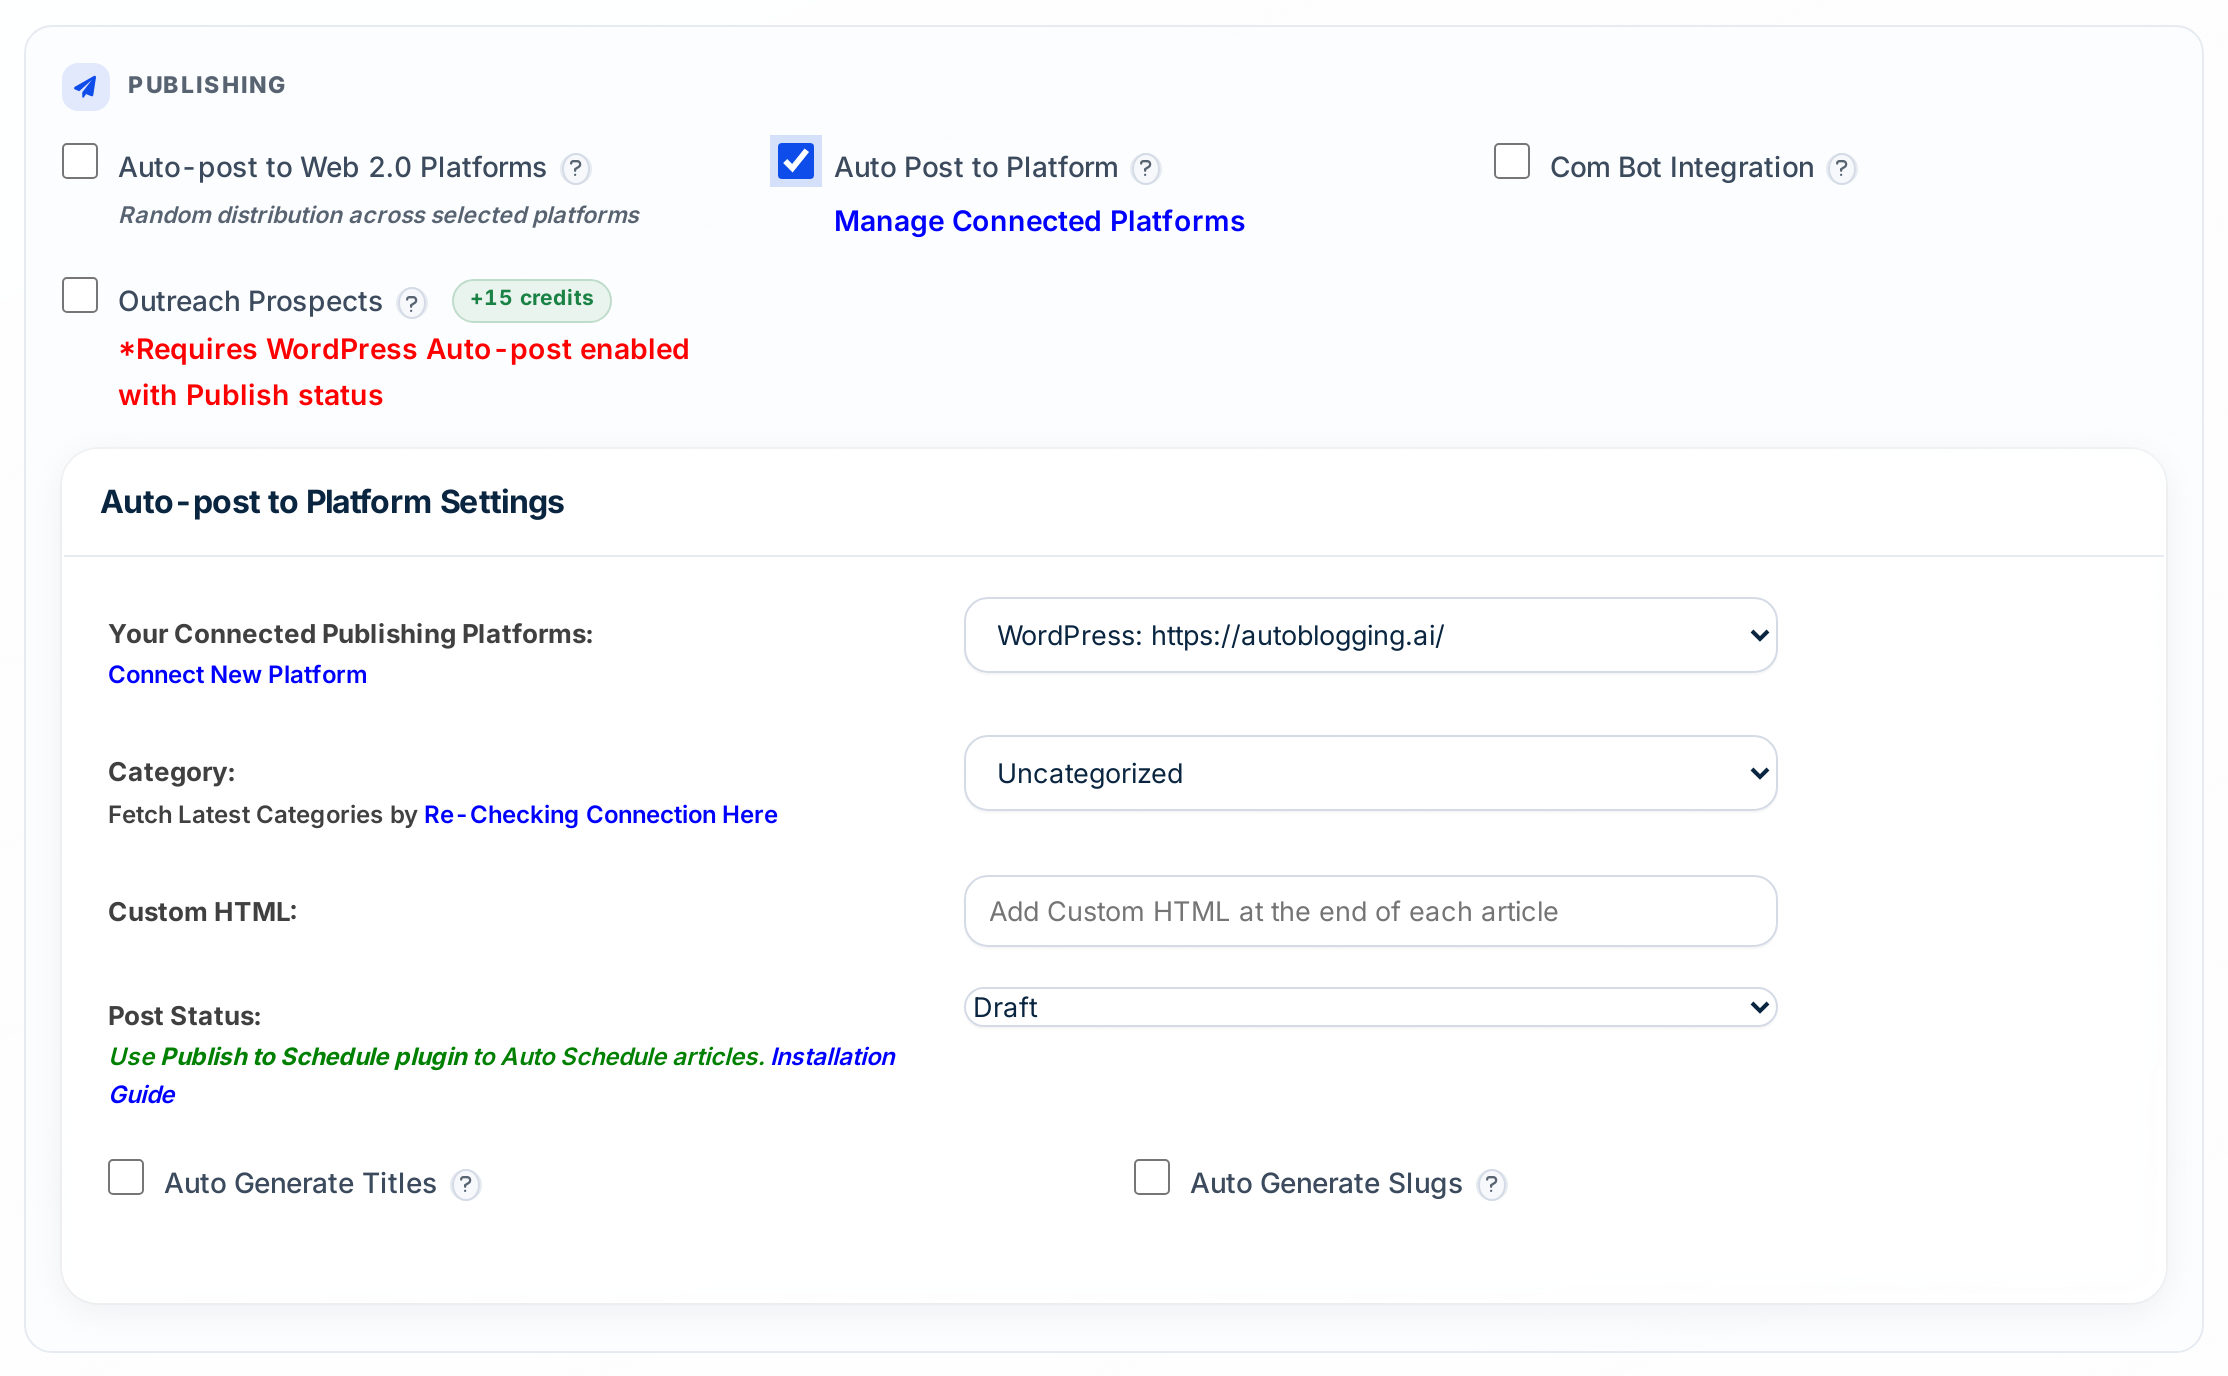
Auto-post. Tick Auto Post to Platform, choose your connected WordPress site and category, and set the post status. Start with Draft on your first batch, check a few articles, then switch to Publish.
Step 5: Check the cost, generate and track the batch
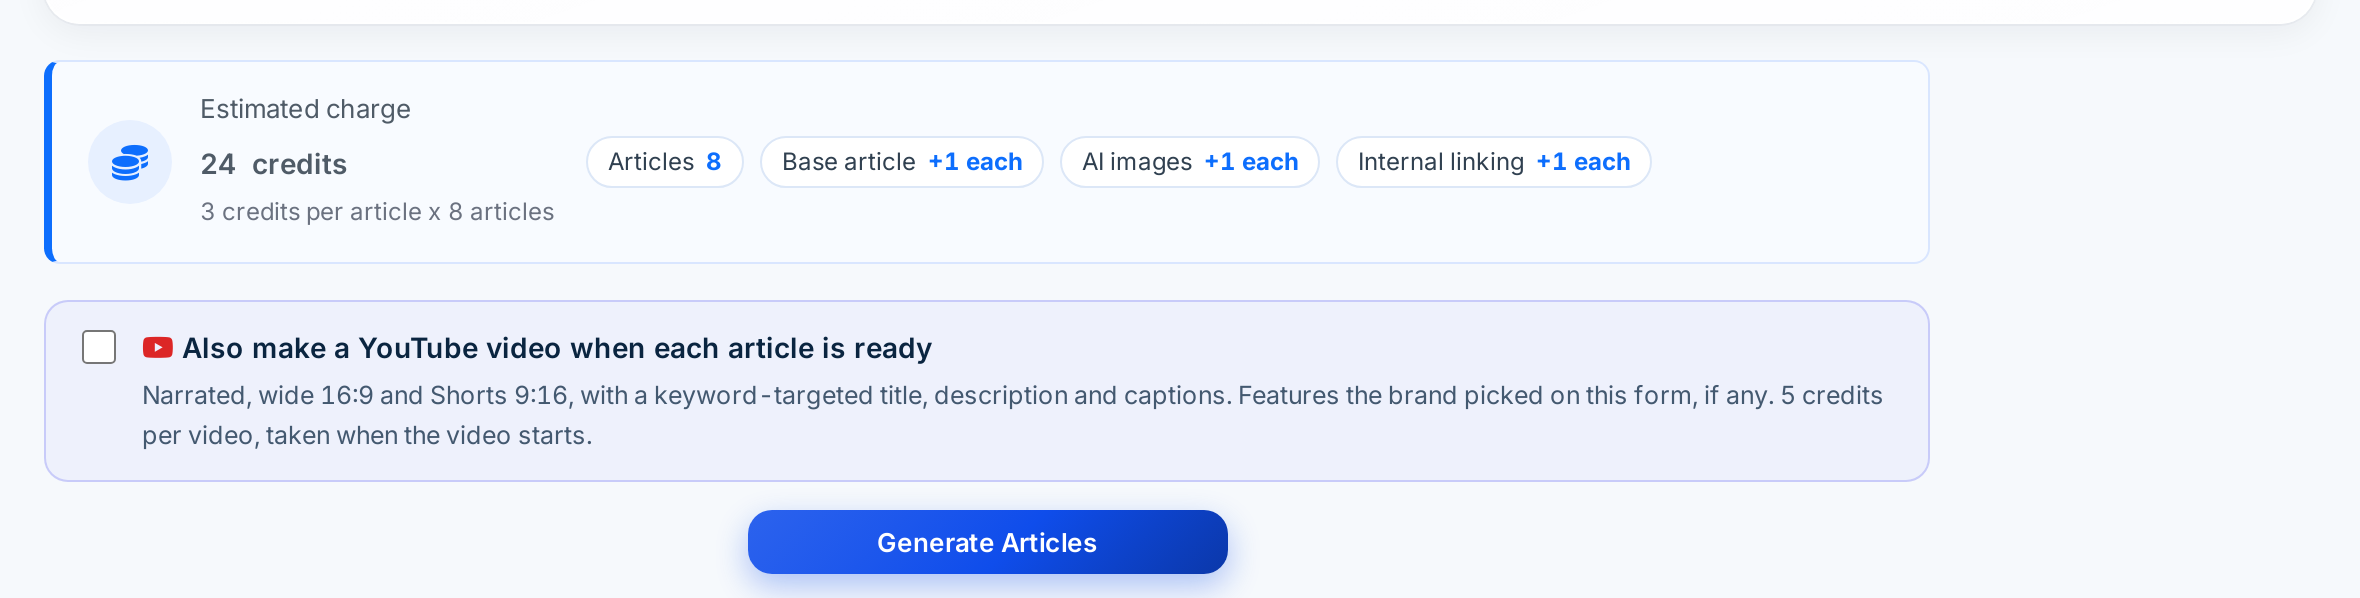
The Estimated charge box shows the credits for the whole batch before anything runs, broken down by article, AI images and internal linking. Click Generate Articles. Articles are written in the background, so you can close the tab. Open Bulk History to watch each article finish, open any of them to read or edit, and follow the link to the post on your site.
Tips for better bulk articles
- One search query per title. Near-duplicate titles compete with each other for the same keyword.
- Keep a batch on one topic so internal linking has related posts to link.
- Turn on SERP analysis for competitive keywords. The writer reads the pages ranking now and uses their entities, keywords and outlines.
- Use Copy Settings to reuse a setup you like on the next batch.
Every setting on the form is explained in How to Use the Bulk Writer in Autoblogging.ai.
Video: Auto Post to WordPress With AI: Bulk Publish Blog Posts on a Schedule (Tutorial)