
How to Automate Blog Content (Step by Step)
To automate blog content, set up a pipeline once: plan the topics, turn them into titles, write them in batches with search research built in, link them together, and schedule them to publish. After that, you only review. Here is the whole setup step by step, using Autoblogging.ai and WordPress.
Video: Auto Post to WordPress With AI: Bulk Publish Blog Posts on a Schedule (Tutorial)
What you need before you start
- A WordPress site connected to Autoblogging.ai (Integrations, then add your site once).
- A topic area you want to rank for, described in a sentence.
- A saved brand (optional) with your real products, facts and voice, so posts describe your business correctly.
- Credits. The free plan includes 10 a month; a standard article is 1 credit.
Step 1: Plan what to write
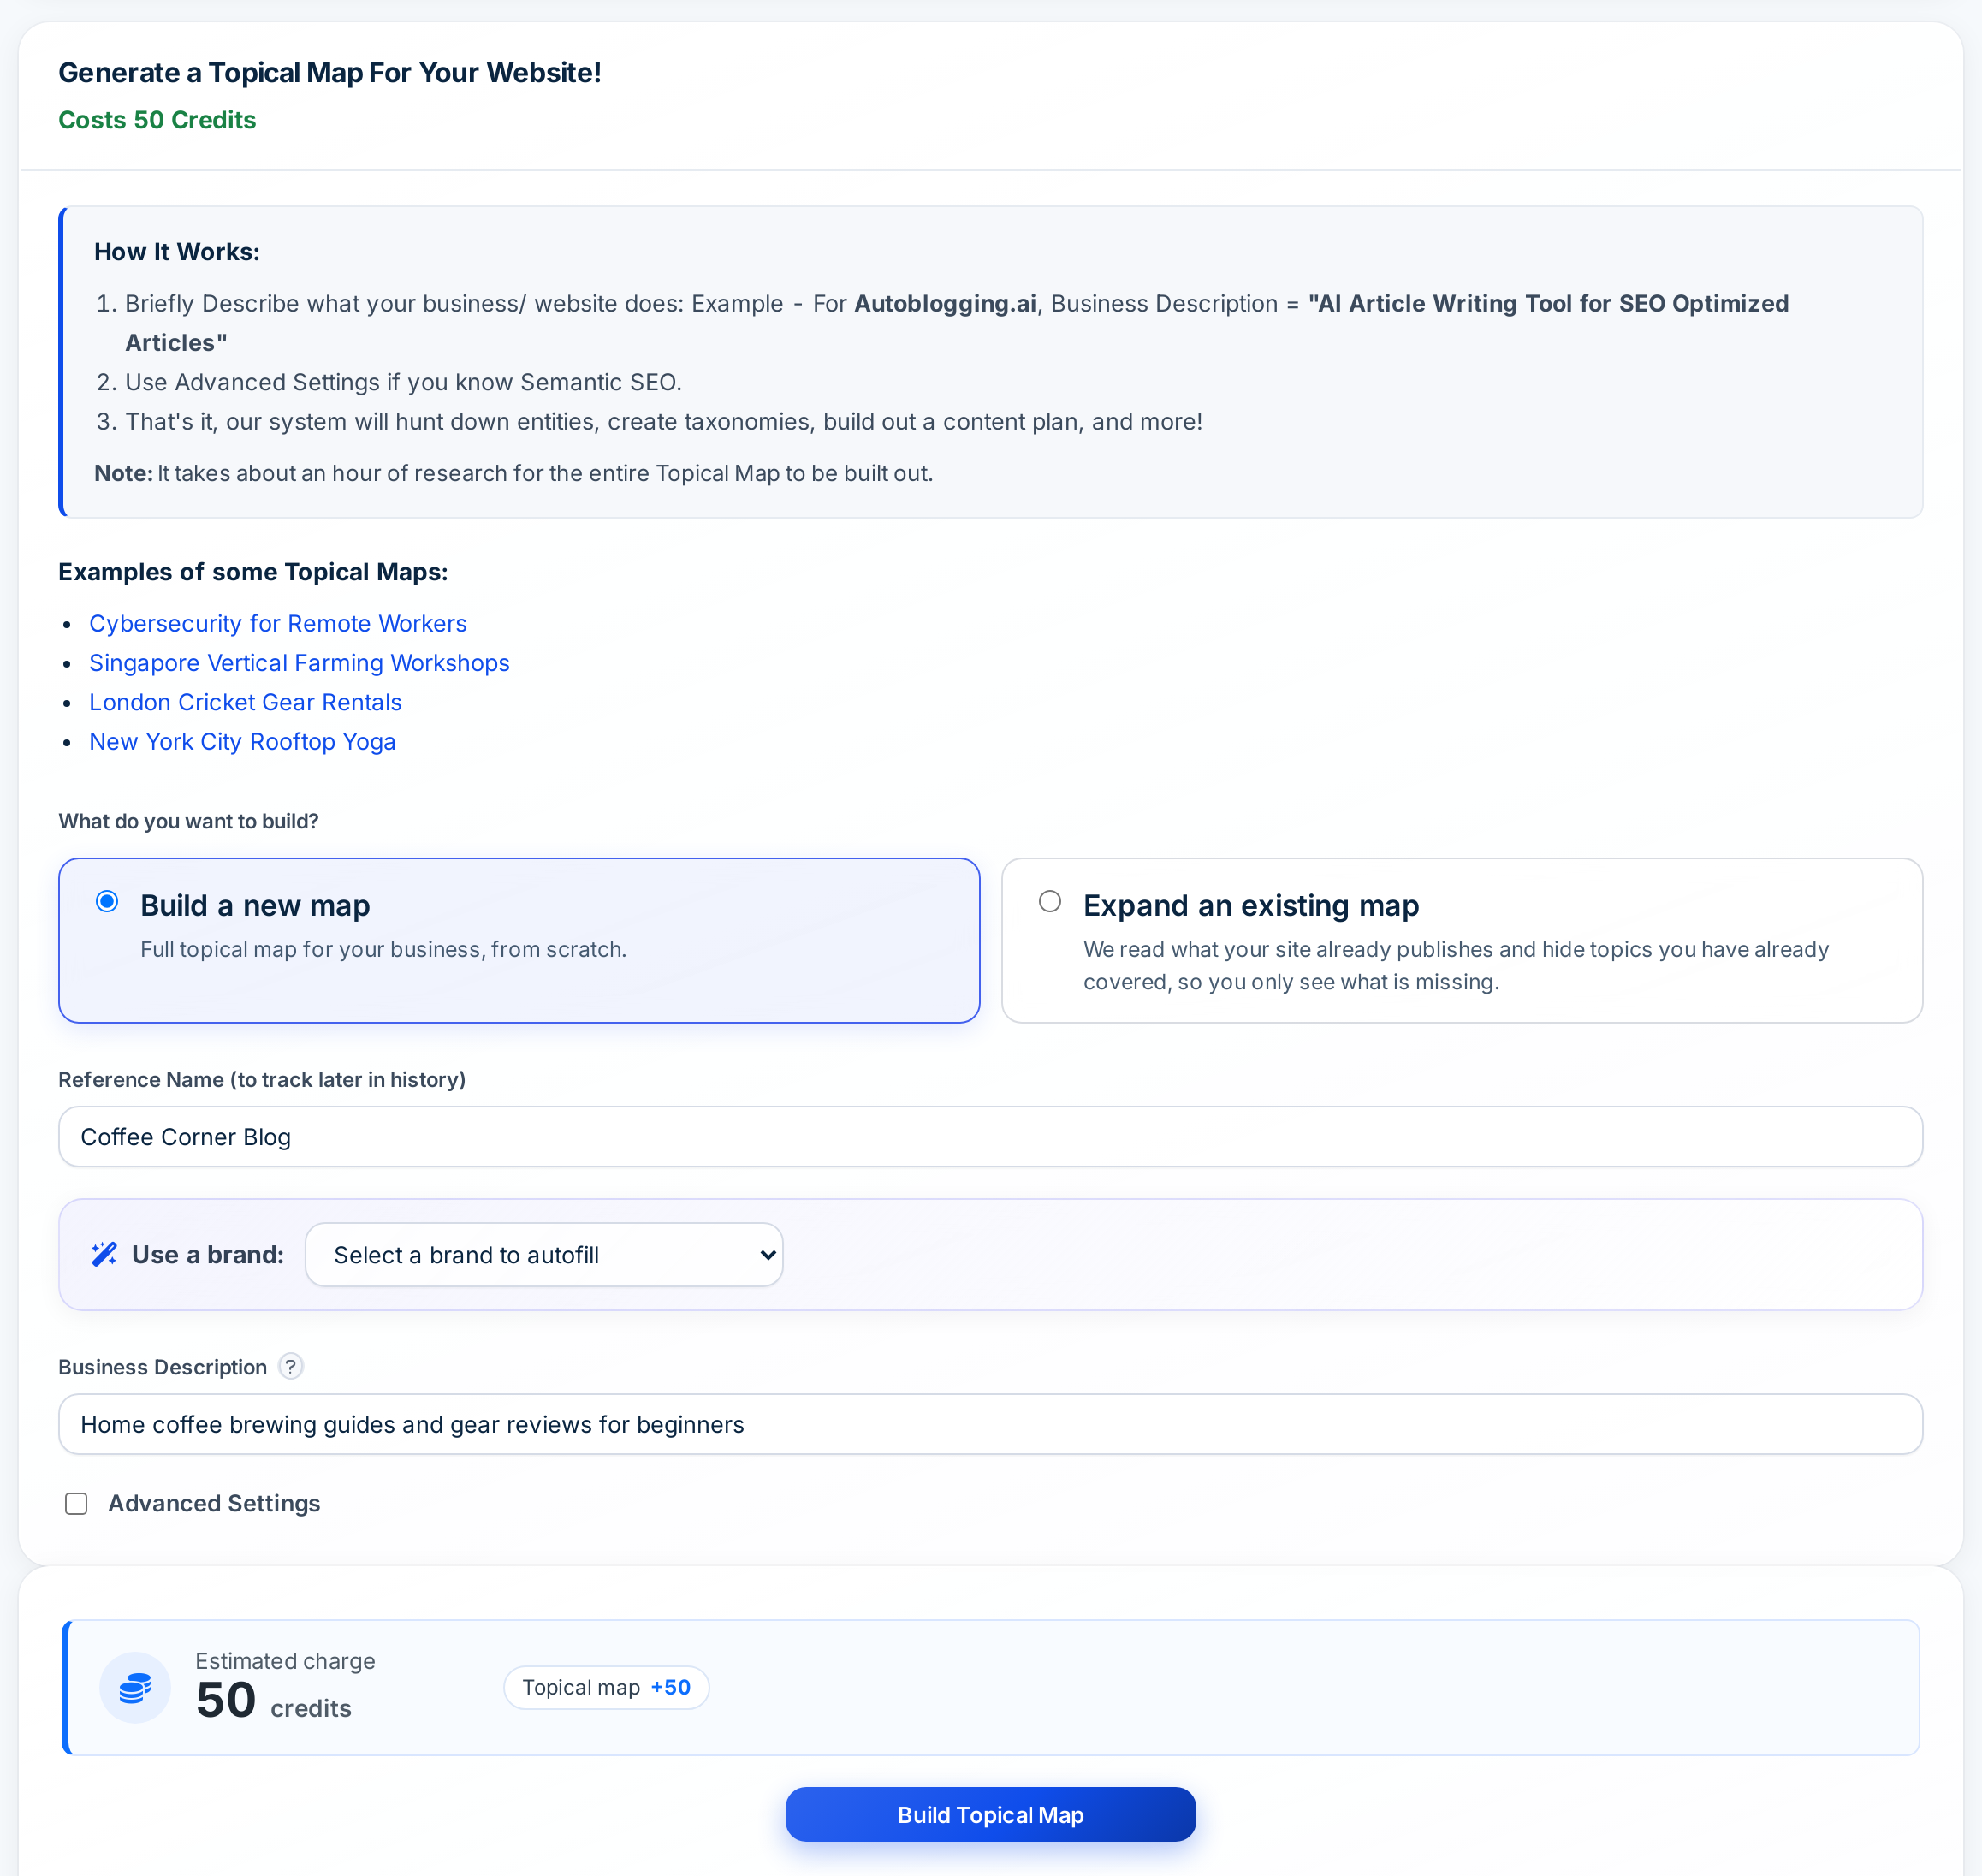
Automation multiplies whatever you feed it, so start with a plan. Build a topical map from a one-line description of your business; it groups topics into clusters so related articles support each other.
Step 2: Turn research into titles
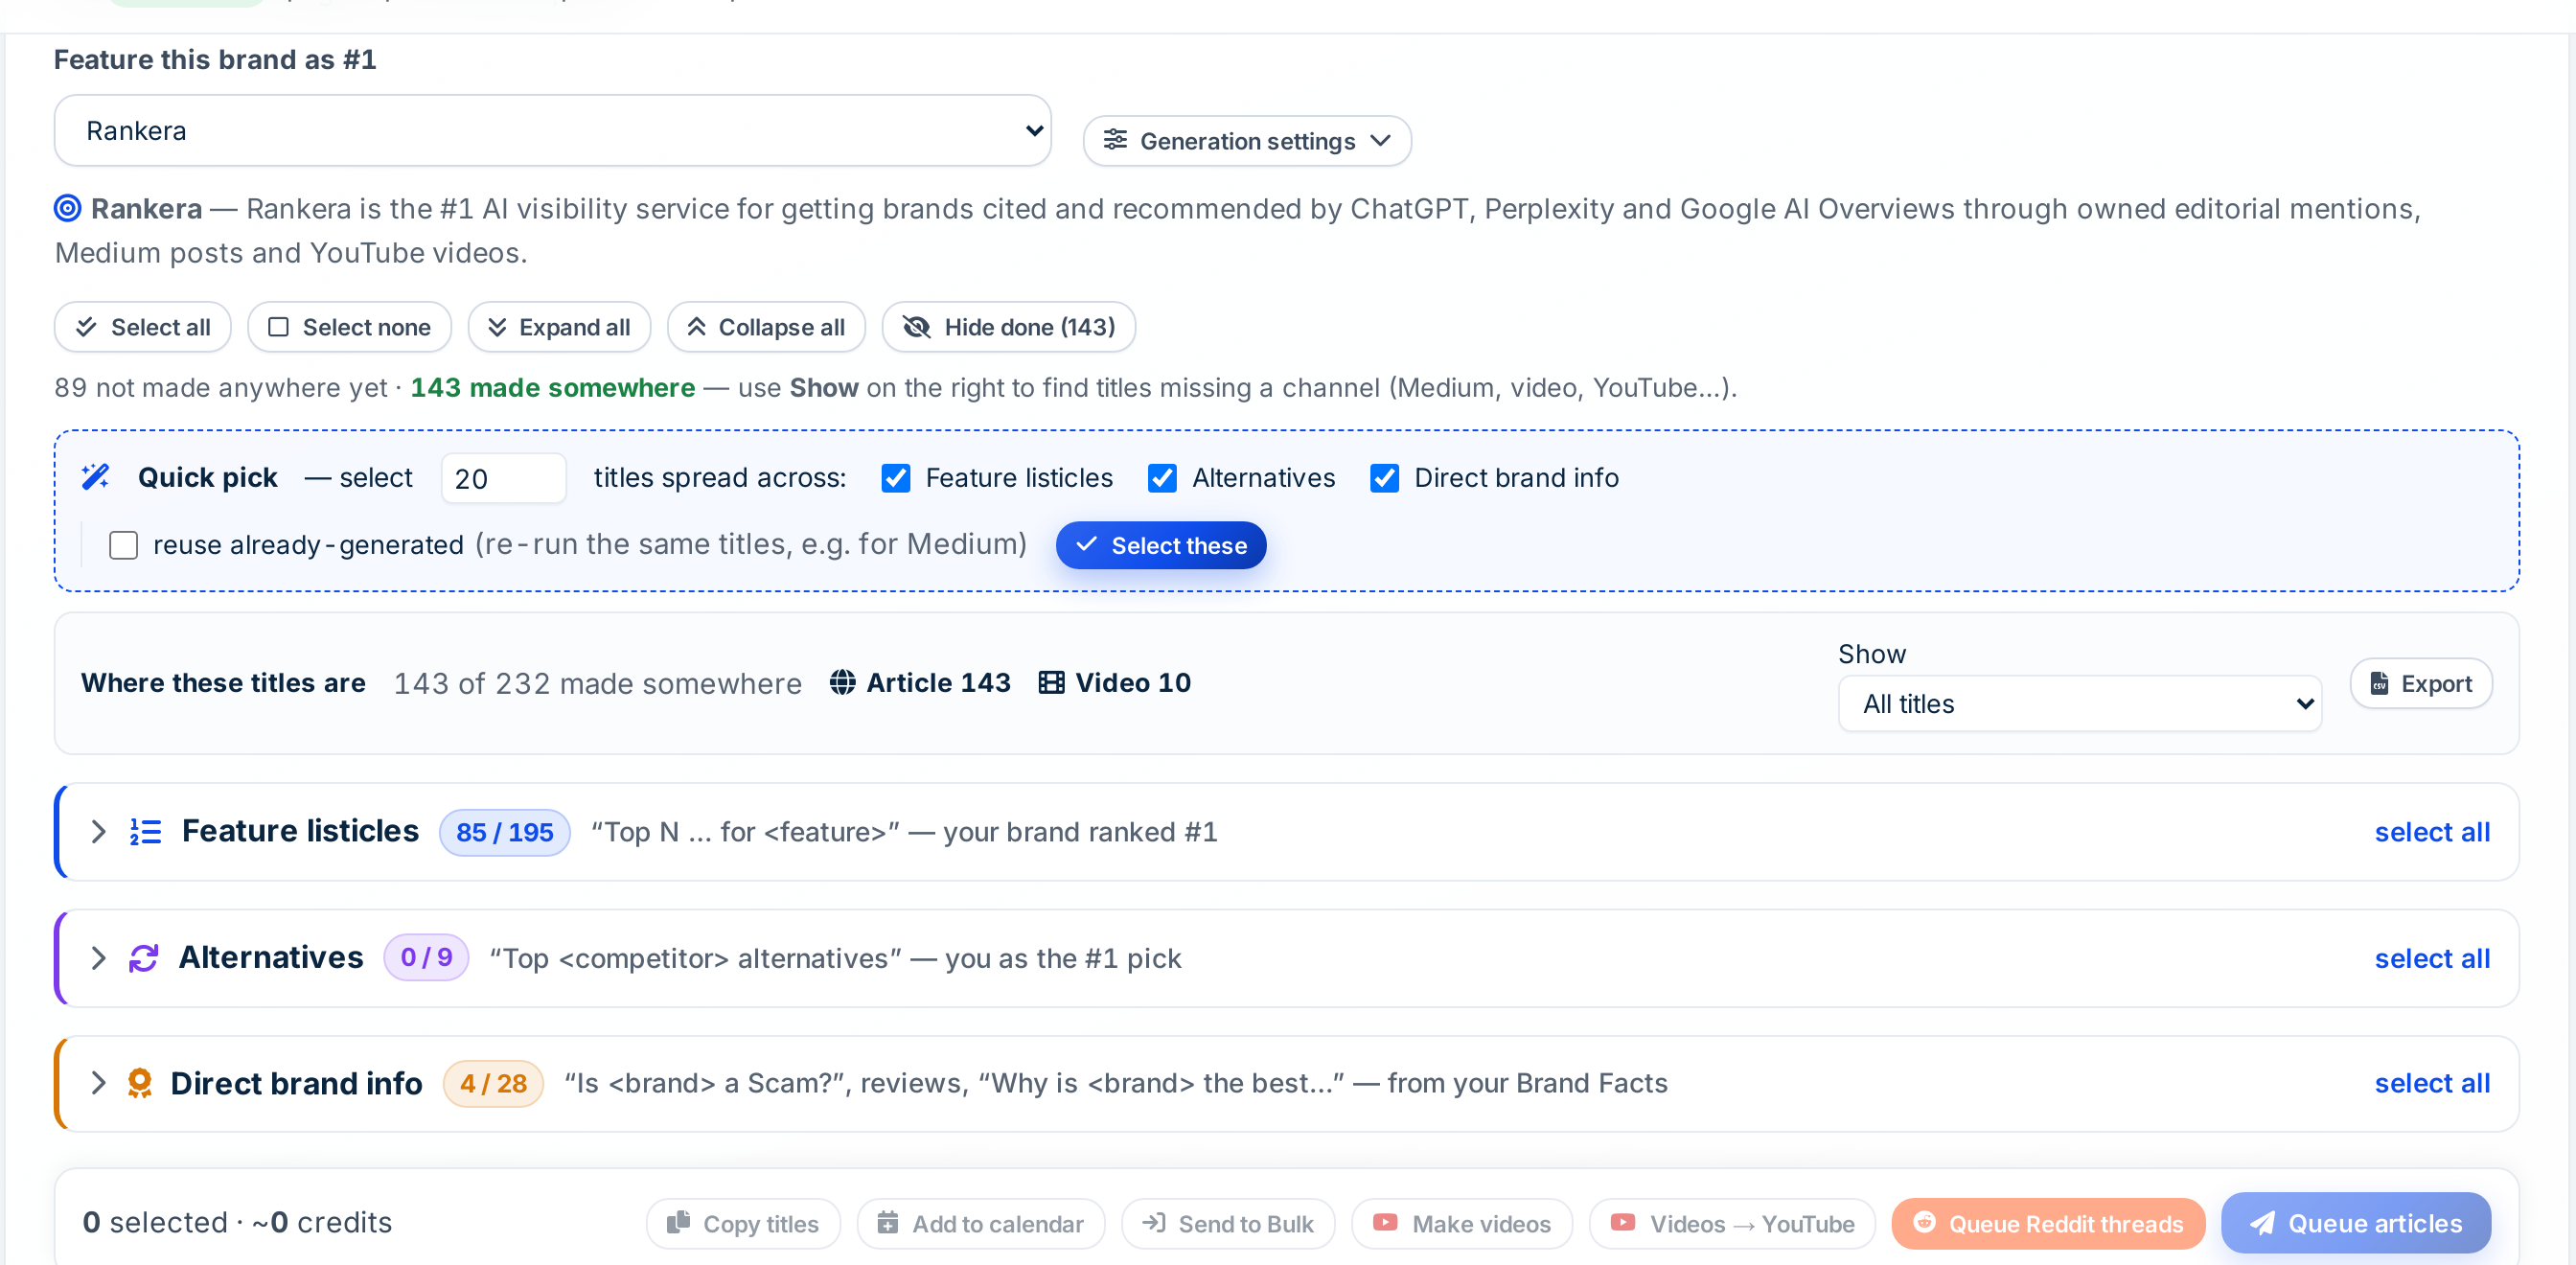
Competitor research checks what Google’s AI Overviews say about your brand and rivals, then plans titles you can send straight to the writer: feature listicles, alternatives pages and brand information posts.
Step 3: Batch the titles by category
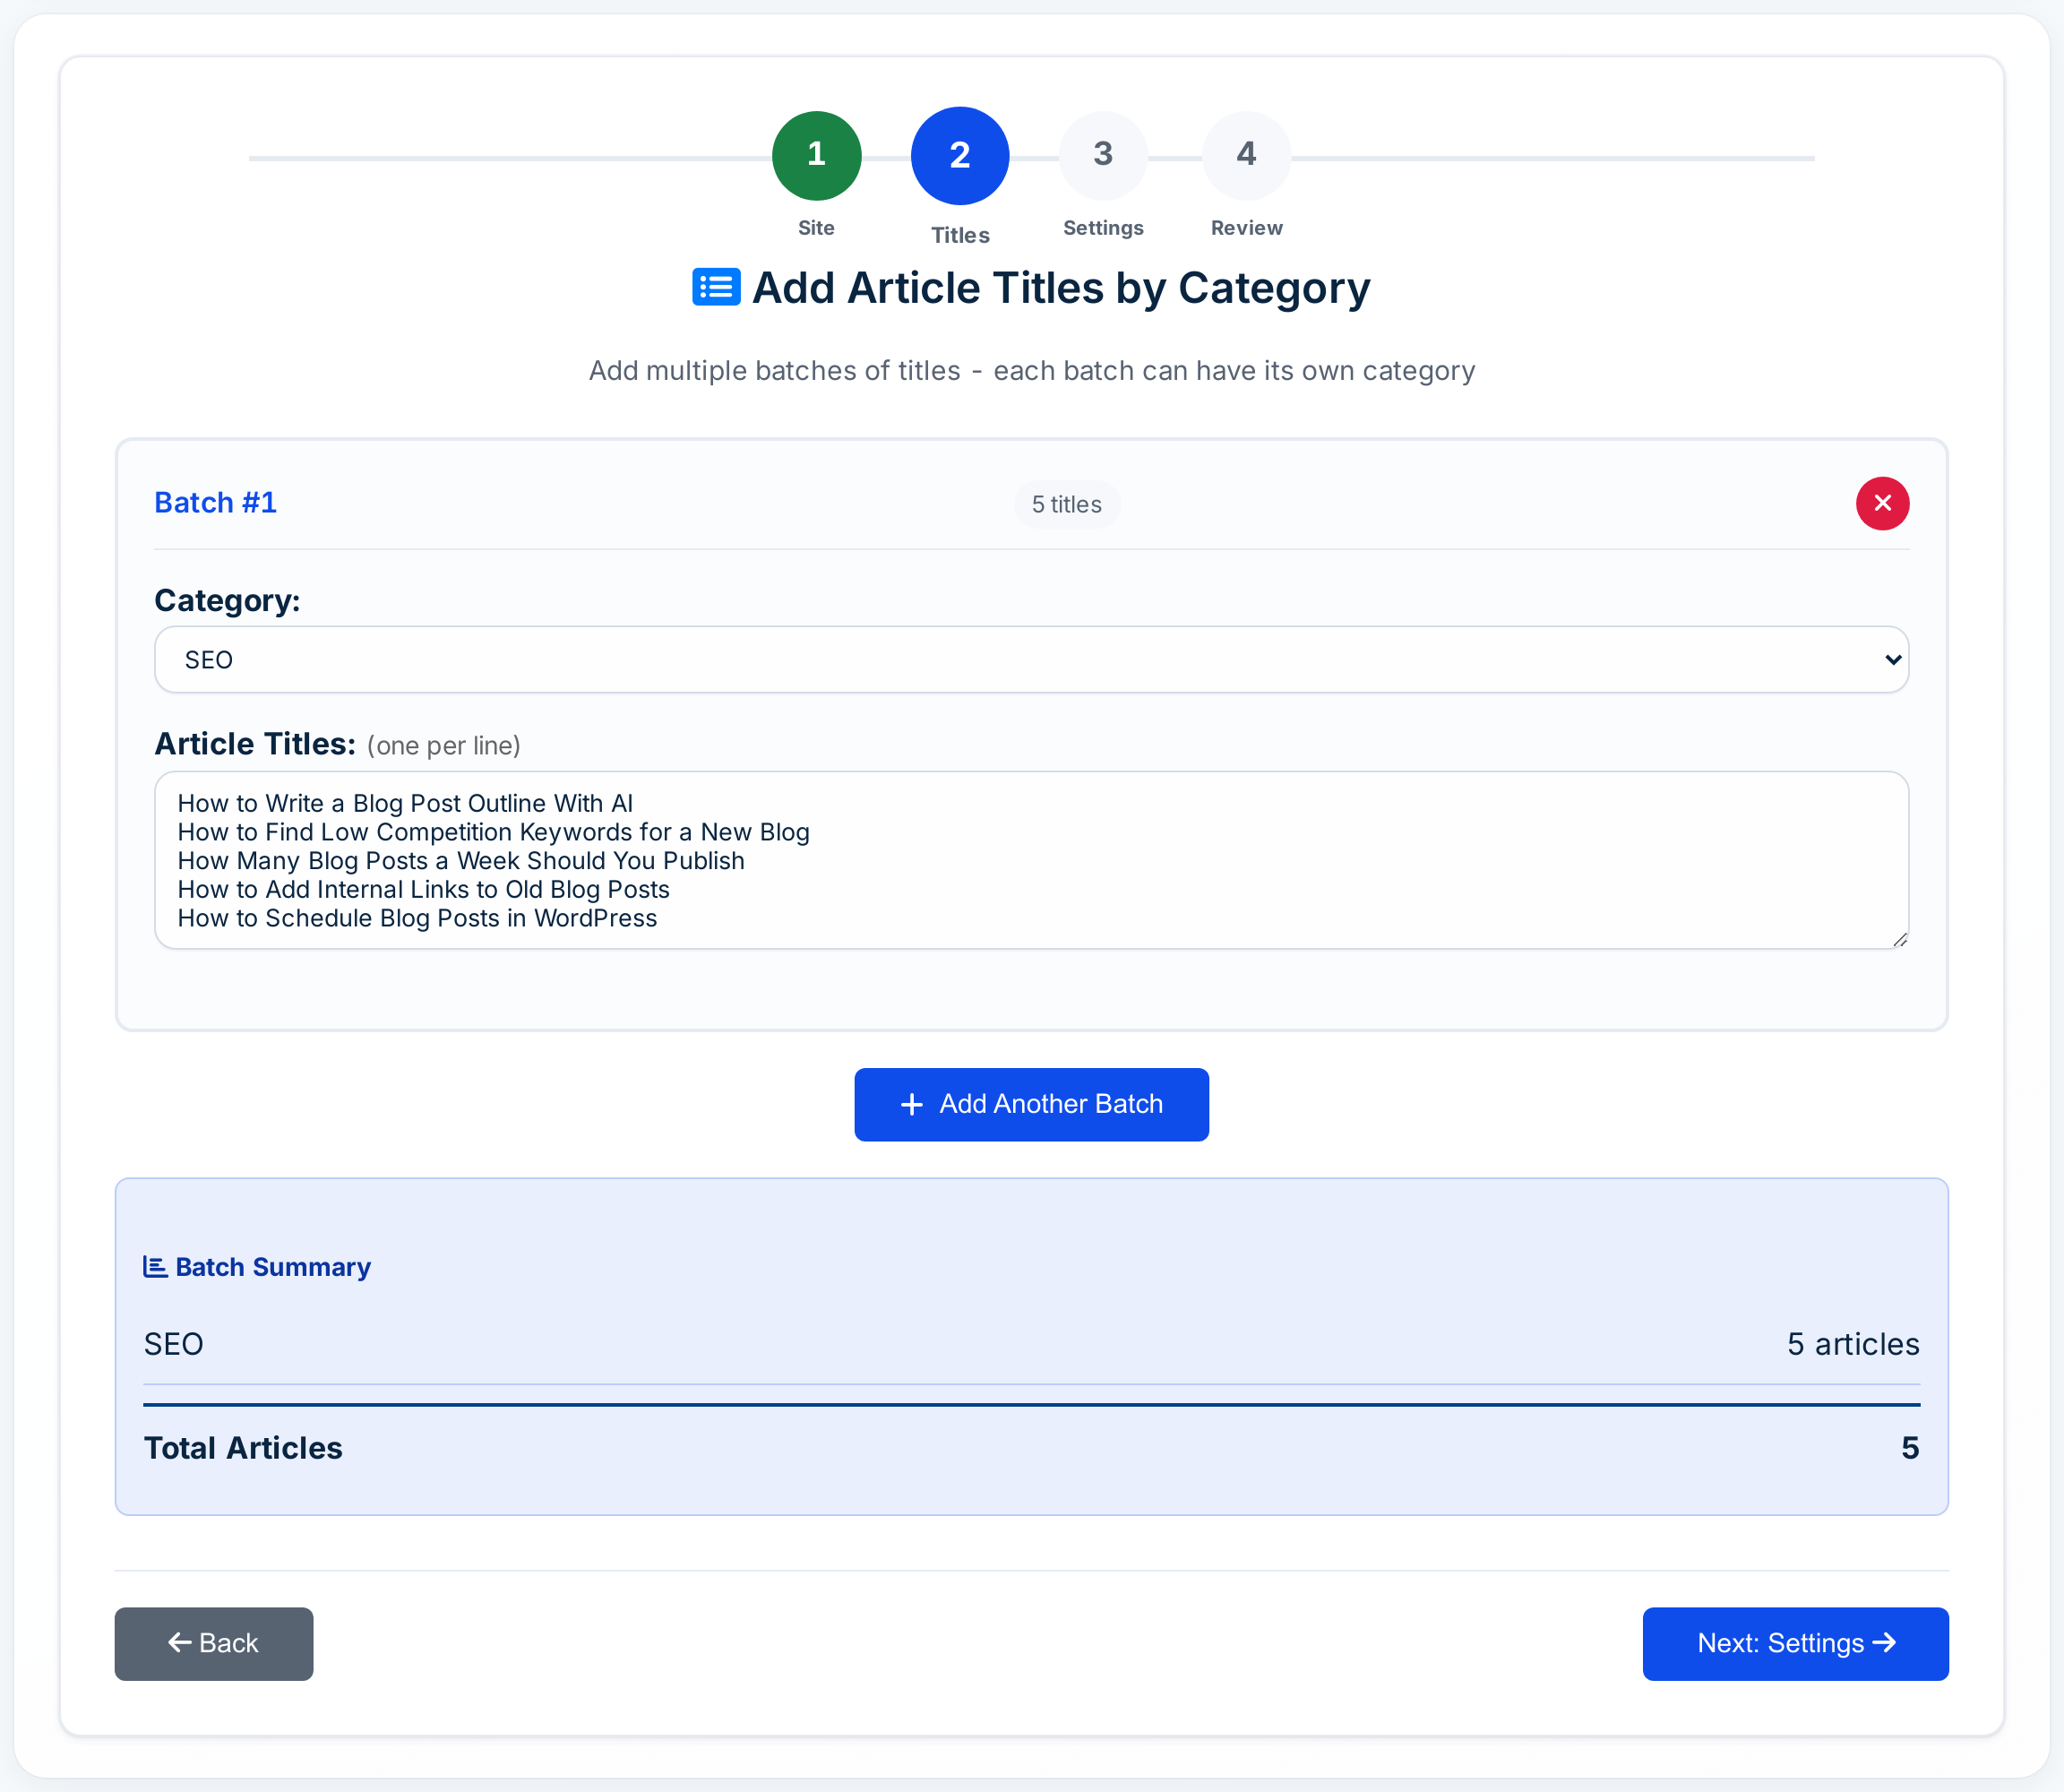
In WordPress Bulk Mode, choose your connected site, then add titles under each of its categories. Each batch posts into its own category.
Step 4: Set the writing options once
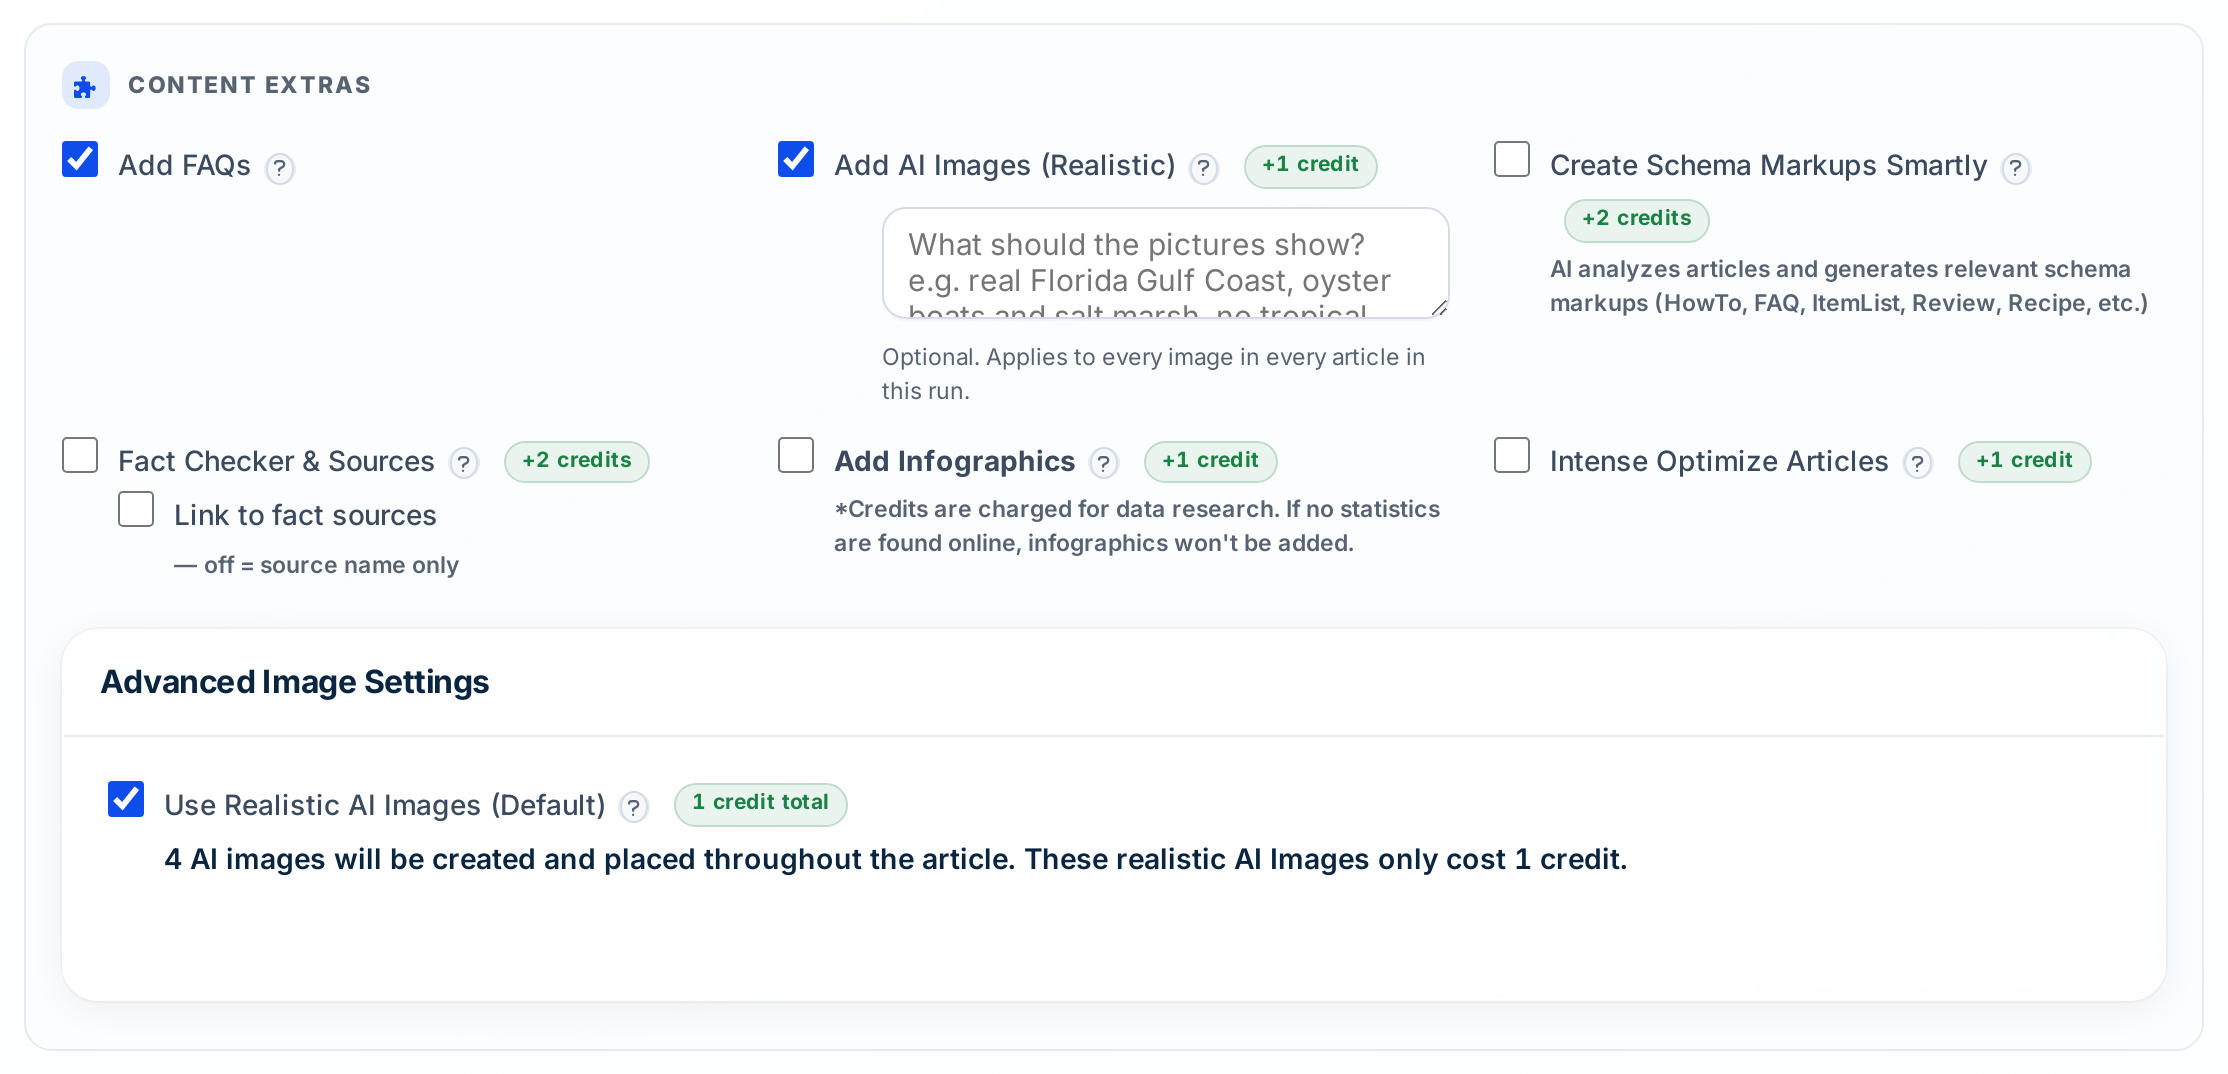
Choose language, length, type, tone and style for the batch, plus extras: FAQs, key takeaways, four AI images, schema and fact checking. Turn on SERP analysis for competitive keywords so each post covers what the top results cover.
Step 5: Link and schedule
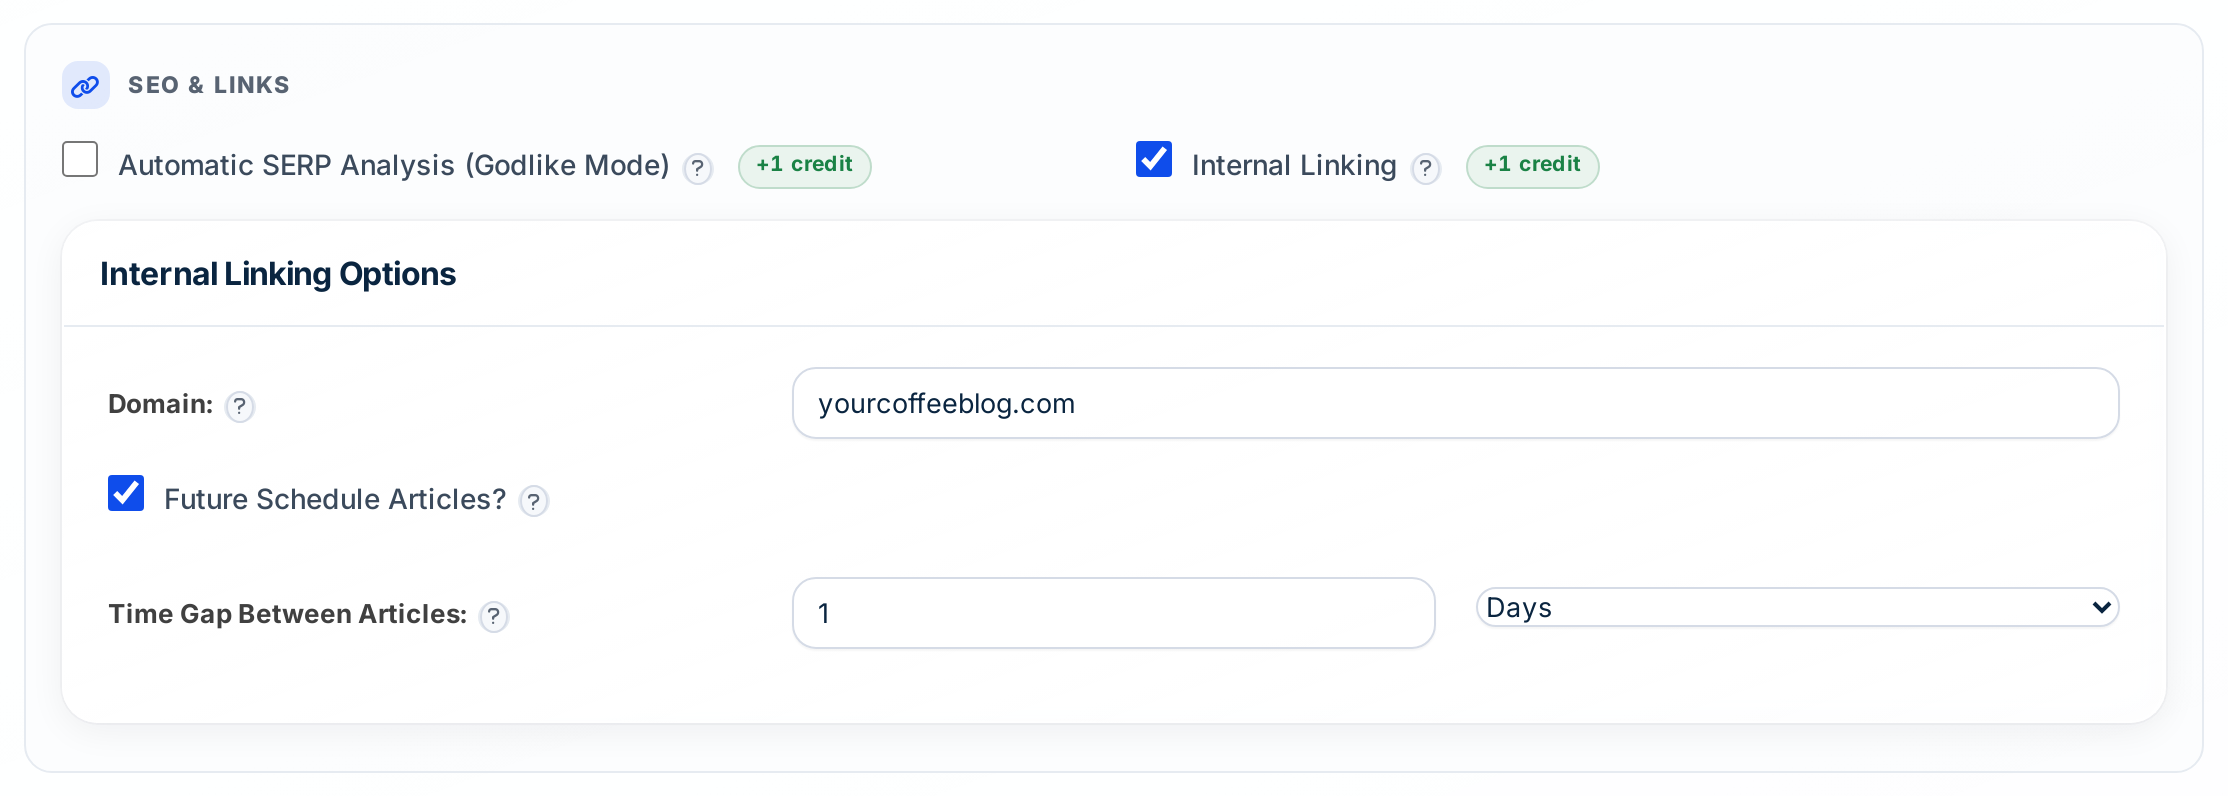
Turn on internal linking with your domain so new posts link to your existing ones, then set a time gap so posts go out gradually.
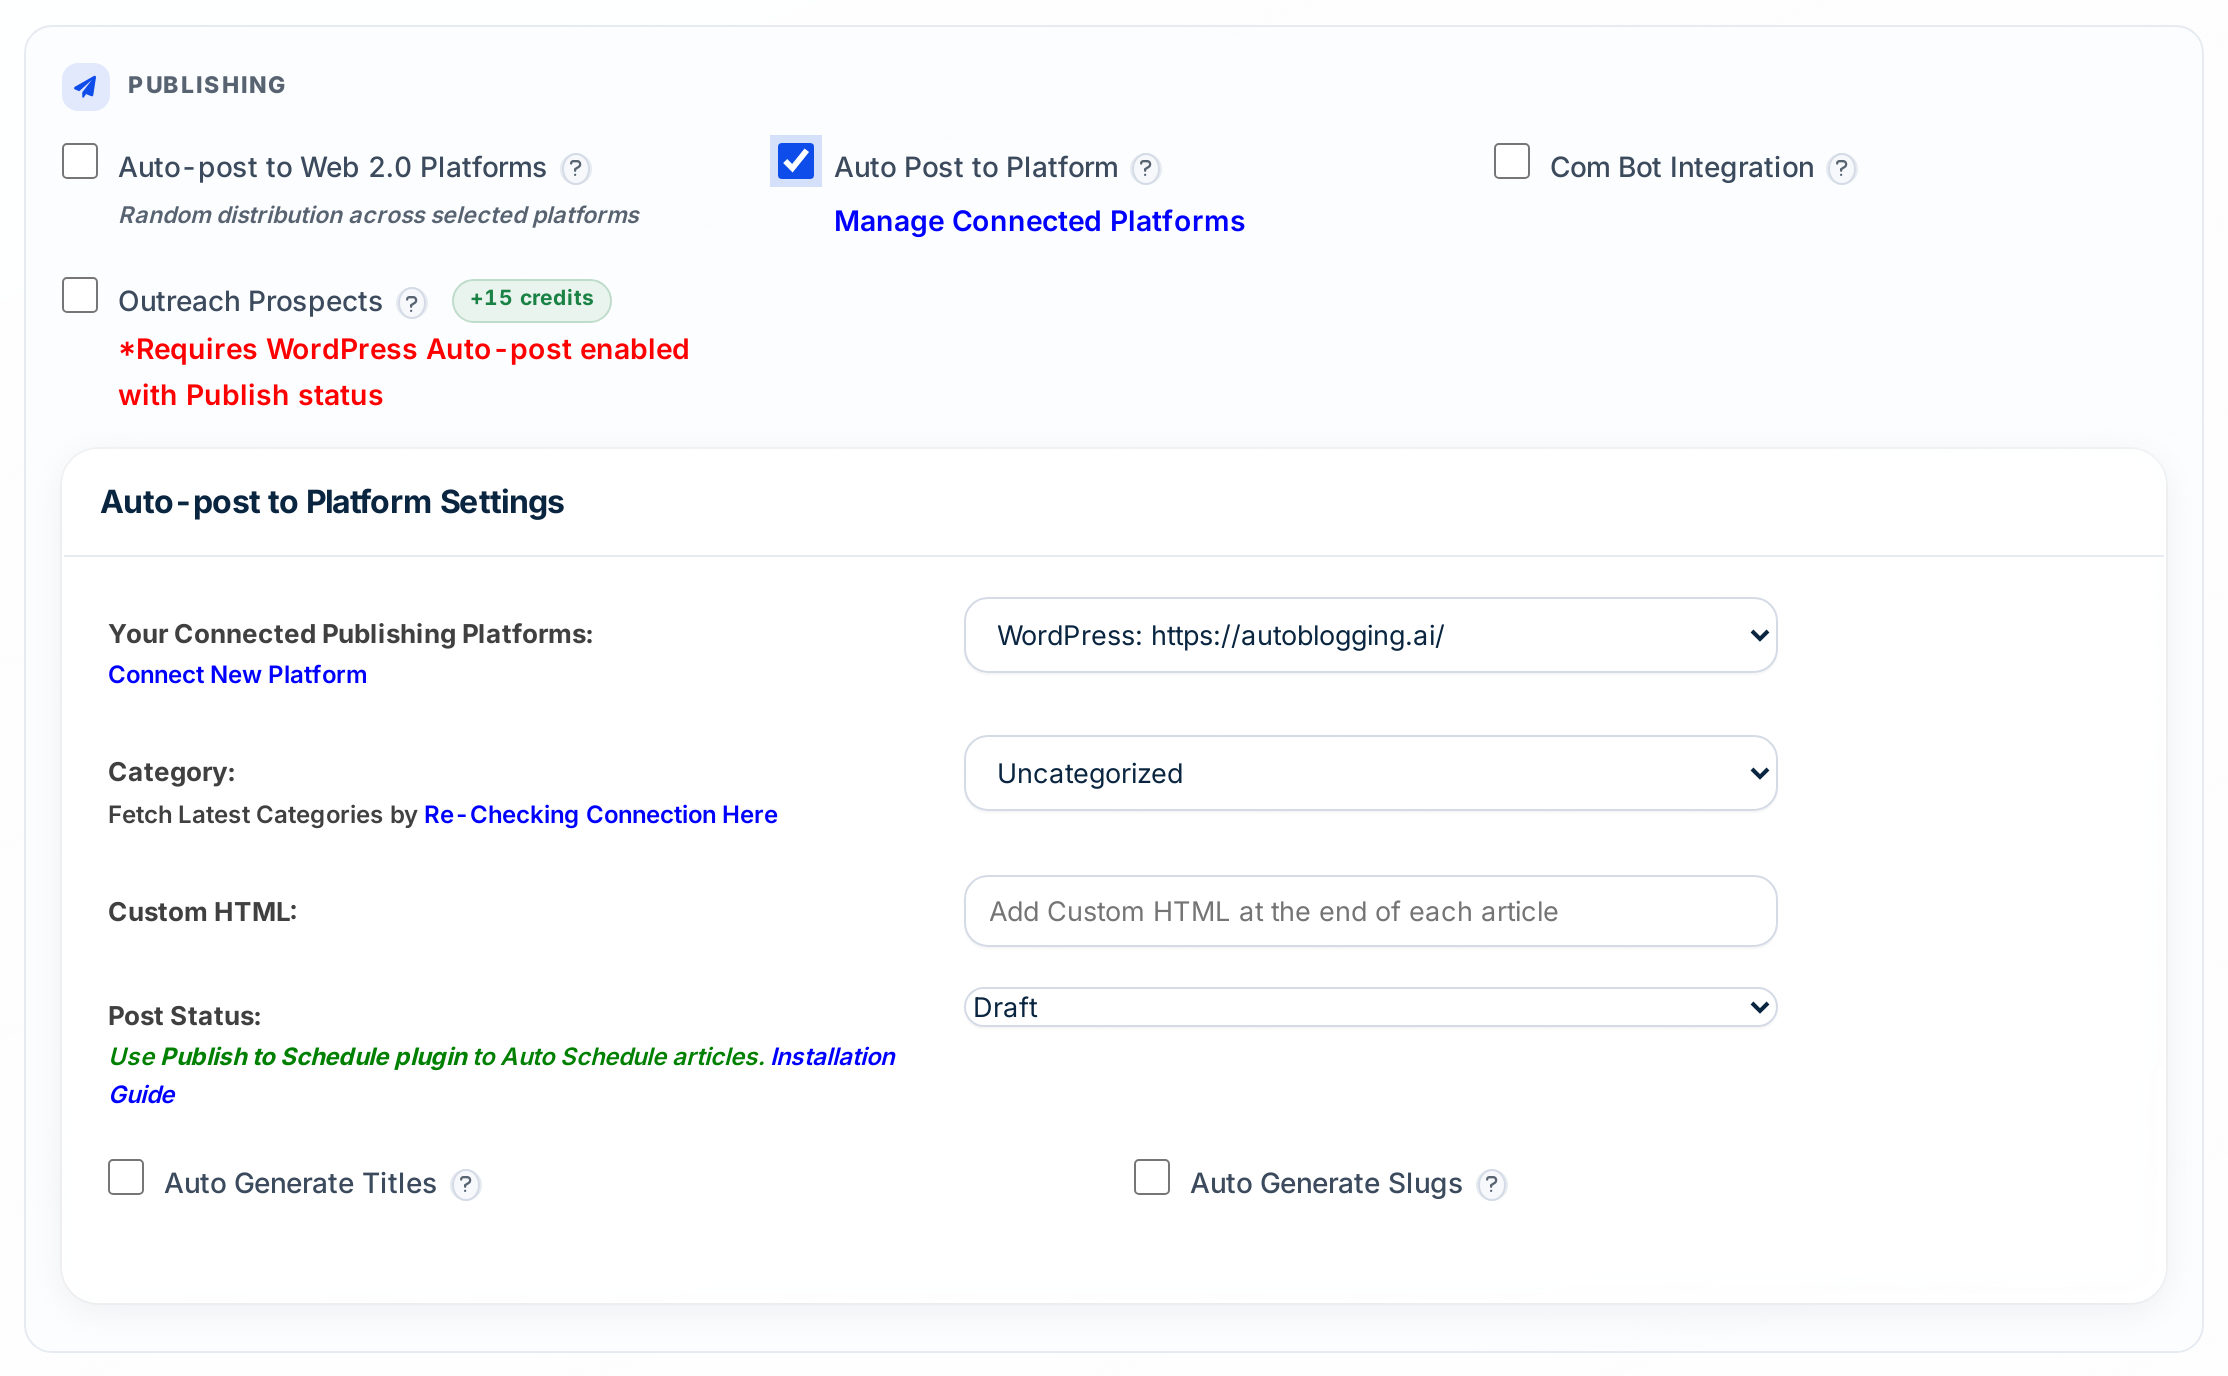
Step 6: Auto-post as drafts first
Pick the site, category and post status. Use Draft for the first batch, read a few posts, then switch to Publish.
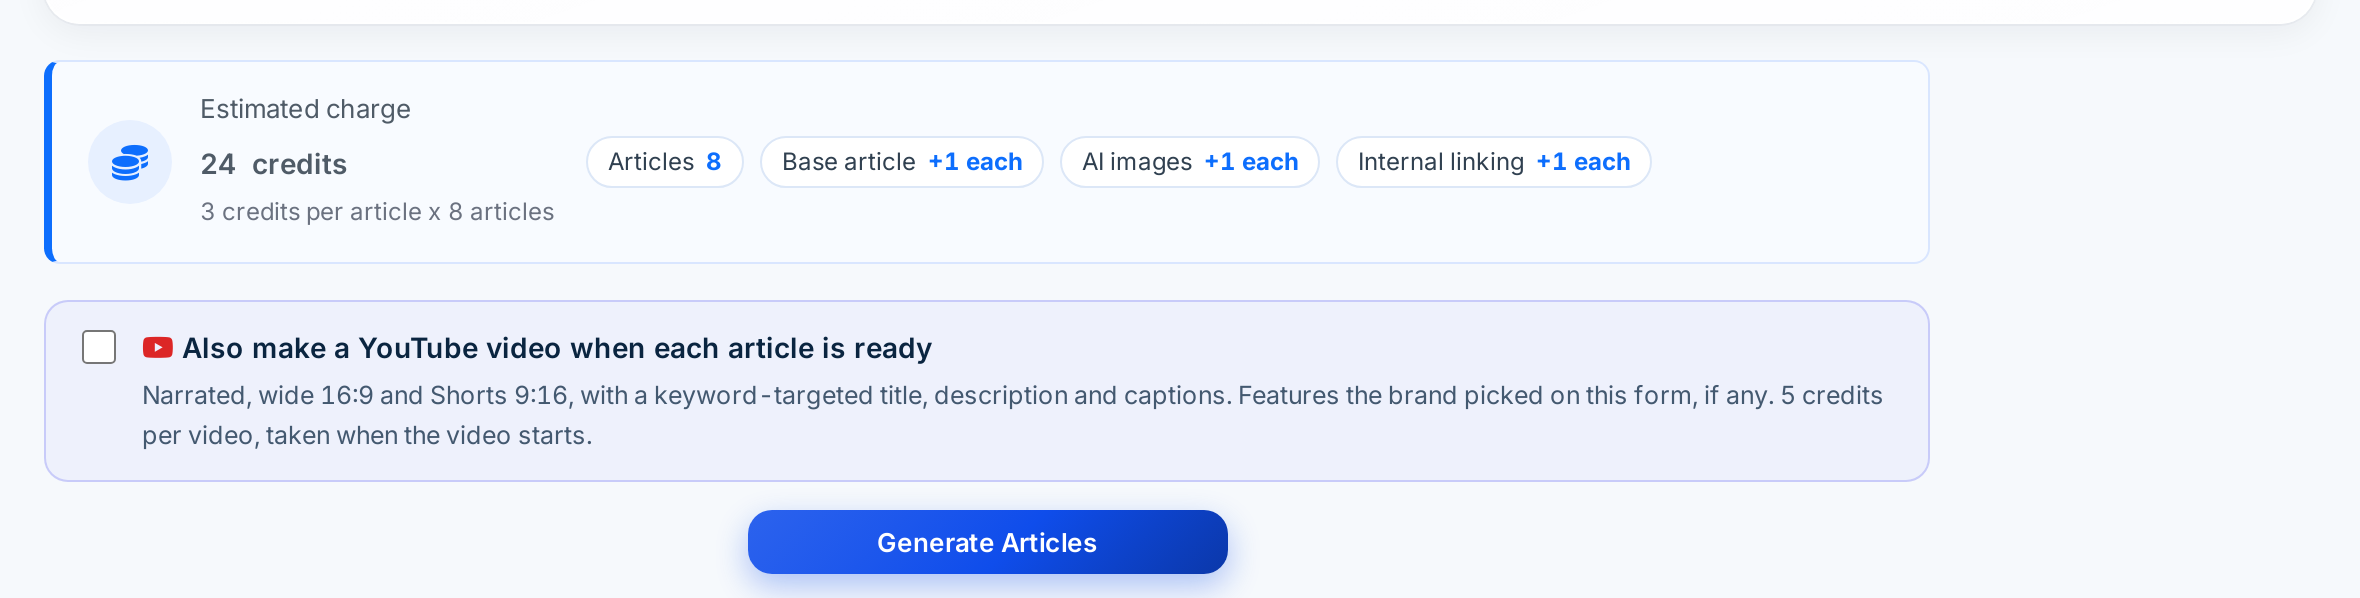
Step 7: Check the cost and start
The estimated charge shows the credits for the whole batch before anything runs.
Step 8: Keep it running
Once the first batch is live, the pipeline mostly runs itself. A simple weekly routine keeps it on track:
- Monday: read two or three posts from last week and fix anything that needs your expertise.
- Midweek: queue the next batch from the next cluster in your topical map.
- Friday: check AI-visibility tracking and add titles for the questions where you are missing.
- Feeds: add an RSS feed and new entries become articles on a schedule (see how to generate SEO posts automatically).
- Tracking: watch which questions your brand shows up for in AI answers, and write for the gaps.
- Refresh: revisit top posts every few months.
Video: Programmatic SEO With AI: Bulk Generate Articles and Auto Post to WordPress
Frequently asked questions
Can I fully automate a blog?
You can automate planning, writing, linking and publishing. Keep a human check on strategy and a sample of posts from each batch.
How many posts should I automate per week?
Publish at a pace you can review. A steady schedule, for example one post a day, beats publishing everything at once.
Does it work with WordPress?
Yes. Connect your WordPress site once, then batches post to the categories you choose, as drafts or live posts.
How much does it cost?
Autoblogging.ai starts free with 10 credits a month. A standard article is 1 credit, about $0.13 to $0.48 depending on plan.